 Store Closed Page Documentation
A) Installation – top
Uploading
- Download the add-on
- Go to Admin panel > Add-ons > Manage Add-ons
- Click on [+] to open upload modal window
- Please choose whatever is comfortable to you:
– Local: zip archive is saved on your computer
– Server: zip archive is uploaded on your server
– URL: you have a direct link to the zip archive - After you selected the zip archive please click Upload & install
Activation
- Open add-on settings page Admin panel > Add-ons > Manage Add-ons >
[TH] Store Closed Add-on - In Activation tab insert License key
- Save the settings and go back to Manage Add-ons page
- In same line with the name of the add-on, click Active
- Clear cache, choose Administration > Storage > Clear cache
Make sure that the add-on status is Active
That’s all, the add-on is installed
B) How to close the store – top
- In order to close the store: Go to Admin panel > Settings > General
- Close storefront
- Press Save to save changes
C) Settings – top
To change add-on settings: Go to Admin panel > Add-ons > Manage Add-ons
Press [gear] and choose Global Settings
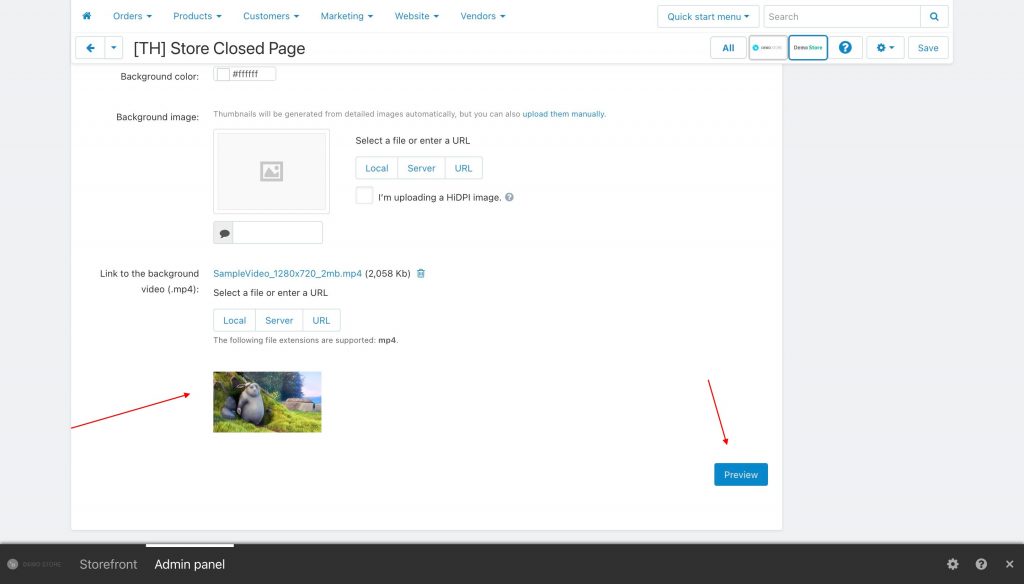
The “Preview” button for checking the page without closing the storefront
In the Ultimate editions, it is configured for each storefront
General
- Font color – The color of the text on the page
- Logo – Upload your store logo or any other image
- Title – Main title
- Message – A text message to your customers
- Background color – Page background color
- Background image – Load background image
- Video background – Load background video file in mp4 format

Links to social media
- facebook – link to facebook
- twitter – link to twitter
- instagram – link to instagram
- youtube – link to youtube
- vkontakte – link to vkontakte
- google+ – link to google+
- pinterest – link to pinterest
SEO settings
- Title – Title tag
- Description – Meta descriptions tag
- Keywords – Meta keywords tag
Additional settings
- Display option:
- classic view – when the content on the page and the background image takes all the available space
- card view – when the content on the page in the block similar to the card, and the background image takes all the available space
- content left view – when the content of the page on the left and the background image occupies half of the screen to the right
- content right view – when the content of the page on the right, and the background image occupies half of the screen to the left
- Custom CSS – field to enter additional CSS (for advanced users)Example:
.sc_main-info,
.sc_title-area {
font-weight: bold;
text-transform: uppercase;
}
* all settings are optional
D) JavaScript – top
After installing the add-on javascript files are located in js/addons/ath_store_closed/
- jquery.minicolors.min.js – jQuery MiniColors: A tiny color picker built on jQuery (read more here)
- scripts.js – initialization jQuery MiniColors
E) CSS Structure – top
After installing the add-on style files are located in store_closed_assets/css/
- bootstrap.min.css – modified build Bootstrap framework (read more here)
- styles.css – page styles
F) Templates – top
After installing the add-on templates are located in app/addons/ath_store_closed/templates/
- index.php – displays the page
- main_info.php – displays the content of the page
G) Other files – top
App folder
In this folder are located add-on settings and the basic logic
app/addons/ath_store_closed/addon.xml – main file for all add-ons. Here are the parameters and settings of the add-on. File Format Scheme 3.0 CS-Cart
app/addons/ath_store_closed/func.php – contain the actual function
app/addons/ath_store_closed/controllers/backend/addons.pre.php – the controller connects advanced settings of the addon
app/addons/ath_store_closed/controllers/frontend/init.pre.php – the controller carries out the substitution of the page “store closed”
design/backend/css/addons/ath_store_closed/ – contains css files of the addon for the admin panel
design/backend/media/addons/ath_store_closed/ – contains media files of the addon for the admin panel
design/backend/media/addons/ath_store_closed/ – contains templates of the addon for the admin panel
Language files
Language packs are located at var/langs. The values are taken from there when you install the add-on
To add new values or change the current: Go to Admin panel > Administration > Languages > Translations
H) Sources and Credits – top
I’ve used the following images, icons or other files as listed.
- jQuery MiniColors by Cory LaViska
- Image from unsplash.com
- Image “worker” from freedesignfile.com
Changelog
1.13 (04 Aug 2025)
Fixed previewer bug for the Store Builder edition

1.12 (13 May 2025)
We’ve fixed the preview issue for Ultimate editions
and also updated the Twitter (X) icon

1.11 (20 Dec 2024)
- Updated the update system
- Improved compatibility with the latest CS-Cart editions
- Minor fixes

1.10 (15 Dec 2022)
Added a convenient background video download
Improved preview performance for ultimate editions

1.09 (02 Sep 2022)
Added new icons for output on the page
Removed the google plus icon
Updated font awesome
Updated the license system

1.08 (30 May 2022)
Added a preview page
Added favicon
Fixes in scripts
Updated the add-on icon

1.07 (27 Apr 2021)
Added the ability to update through the Update Center

1.06 (03 Dec 2020)
Updated the add-on for compatibility with CS-Cart 4.12.1
You need to reinstall the add-on
Added support for CS-Cart Multivendor Ultimate

1.05 (23 Sep 2020)
Added support for video background
Added a section to insert MailChimp form
Updated Instagram icon

1.04 (13 Sep 2019)
Fix bugs with skey

1.03 (05 Jun 2019)
Added support for 4.10.1

1.02 (16 Mar 2018)
Correction in styles
