 Full Width Grid Documentation
Installation – top
Uploading
- Download the add-on
- Go to Admin panel > Add-ons > Manage Add-ons
- Click on [+] to open upload modal window
- Please choose whatever is comfortable to you:
– Local: zip archive is saved on your computer
– Server: zip archive is uploaded on your server
– URL: you have a direct link to the zip archive - After you selected the zip archive corresponding to your current version of CS-Cart please click Upload & install
Activation
- Open add-on settings page Admin panel > Add-ons > Manage Add-ons >
[TH] Full Width Grid - In Activation tab insert License key
- Save the settings and go back to Manage Add-ons page
- In same line with the name of the add-on, click Active
- Clear cache, choose Administration > Storage > Clear cache
Make sure that the add-on status is Active
That’s all, the add-on is installed
Add-on settings – top
The add-on starts working immediately after activation.
It works for the Responsive theme and its child themes.
The add-on adds the following settings to the section options:
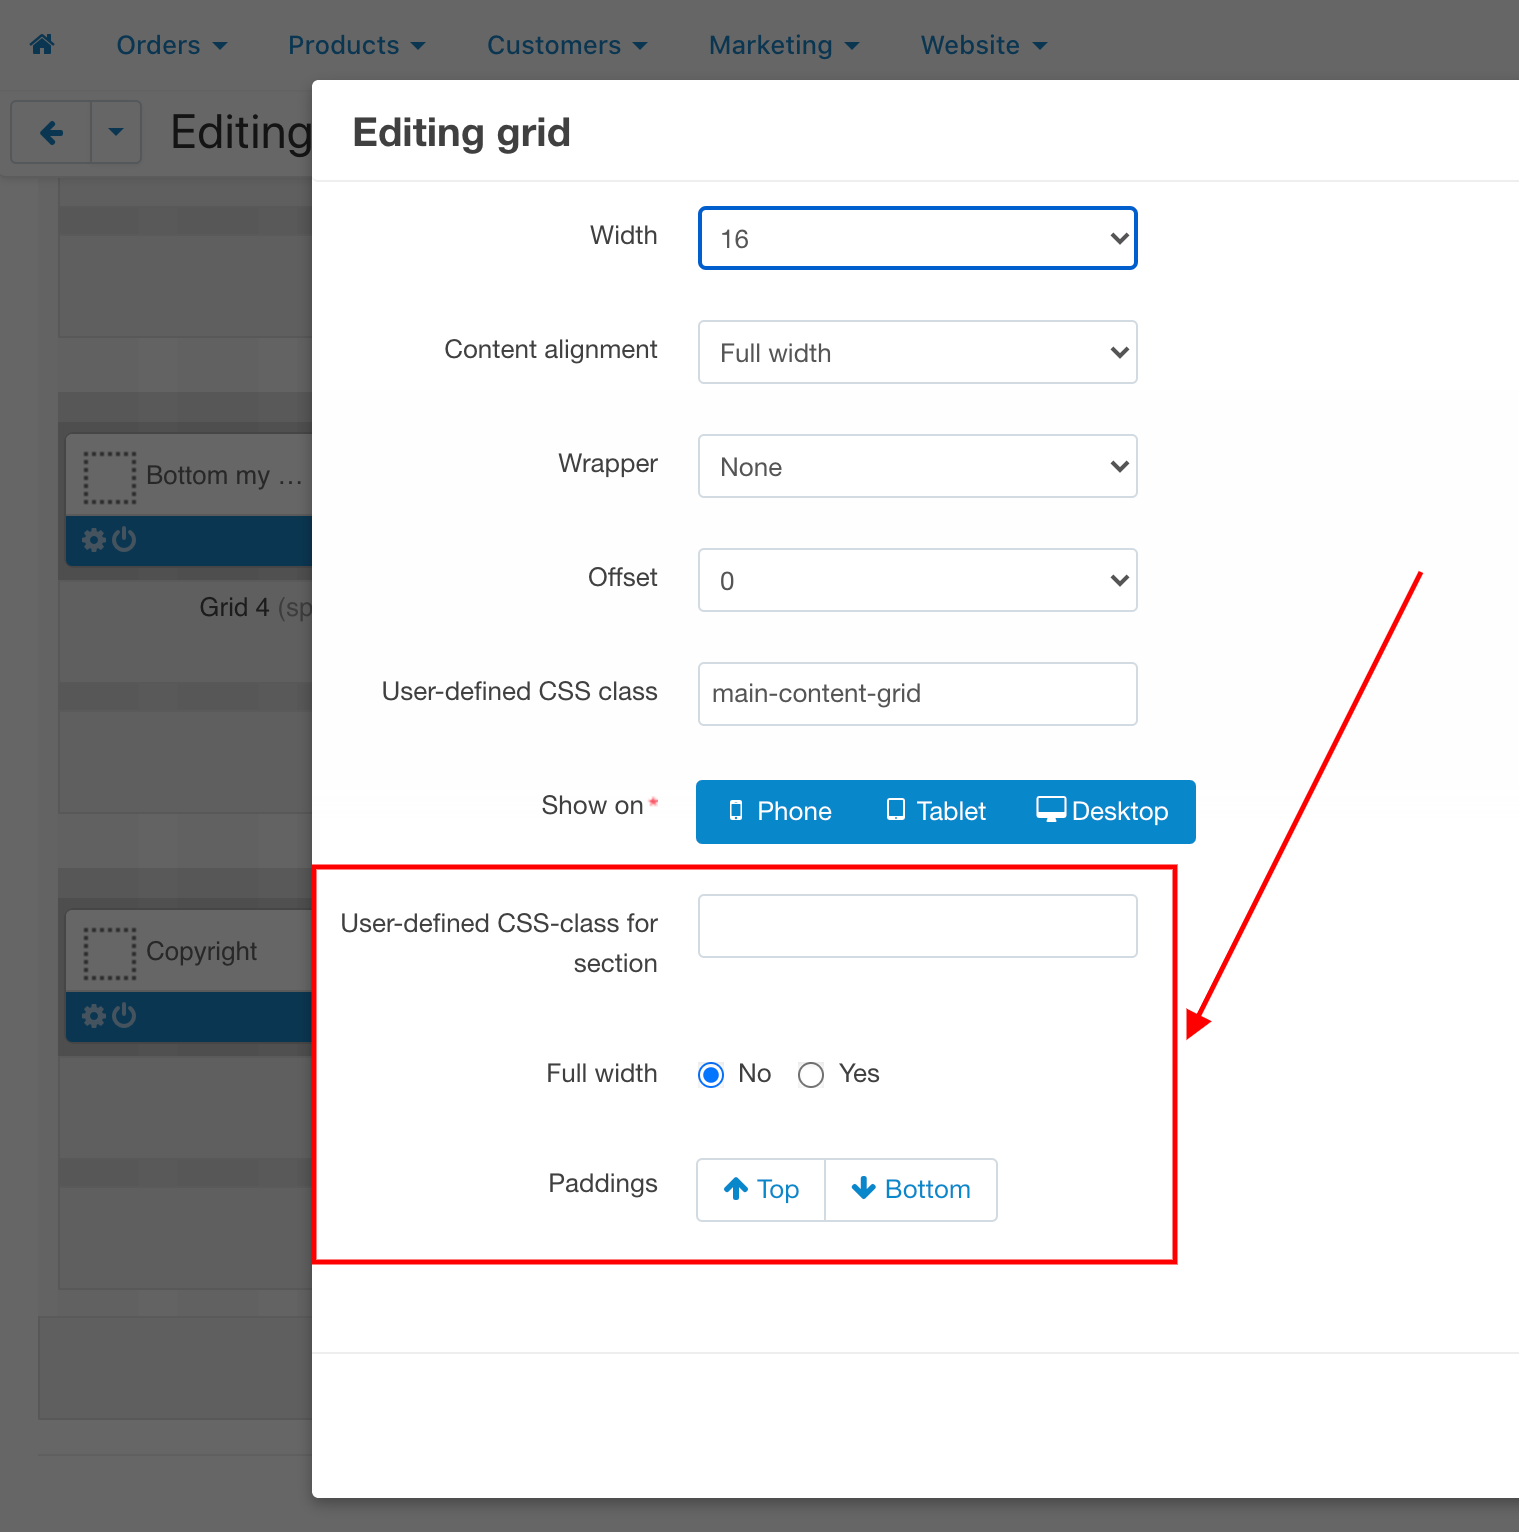
In order for them to appear, the following conditions must be met:
- A section should not have a parent section (section without nesting)
- Width – 16
The size of indents is set globally in the add-on settings.
Use cases and FAQs – top
Full-width banner
- Create a section of maximum width, the default is 16
- After the section is created and the changes are saved, go to its settings (gear) and select the option Full width: Yes
- Create or move a block with banners to a new section
- If this is an old block, then remove all unnecessary classes in the settings
Full-width menu background
- Open the settings of the section containing the menu block
- In the setting Custom CSS class for the section add our own class, for example
fw_bg_1 - Next, add a background for this class via CSS
- How to add CSS to your store described here
An example of the styles used in the demo:
.fw_bg_1{
background: #26323e;
}
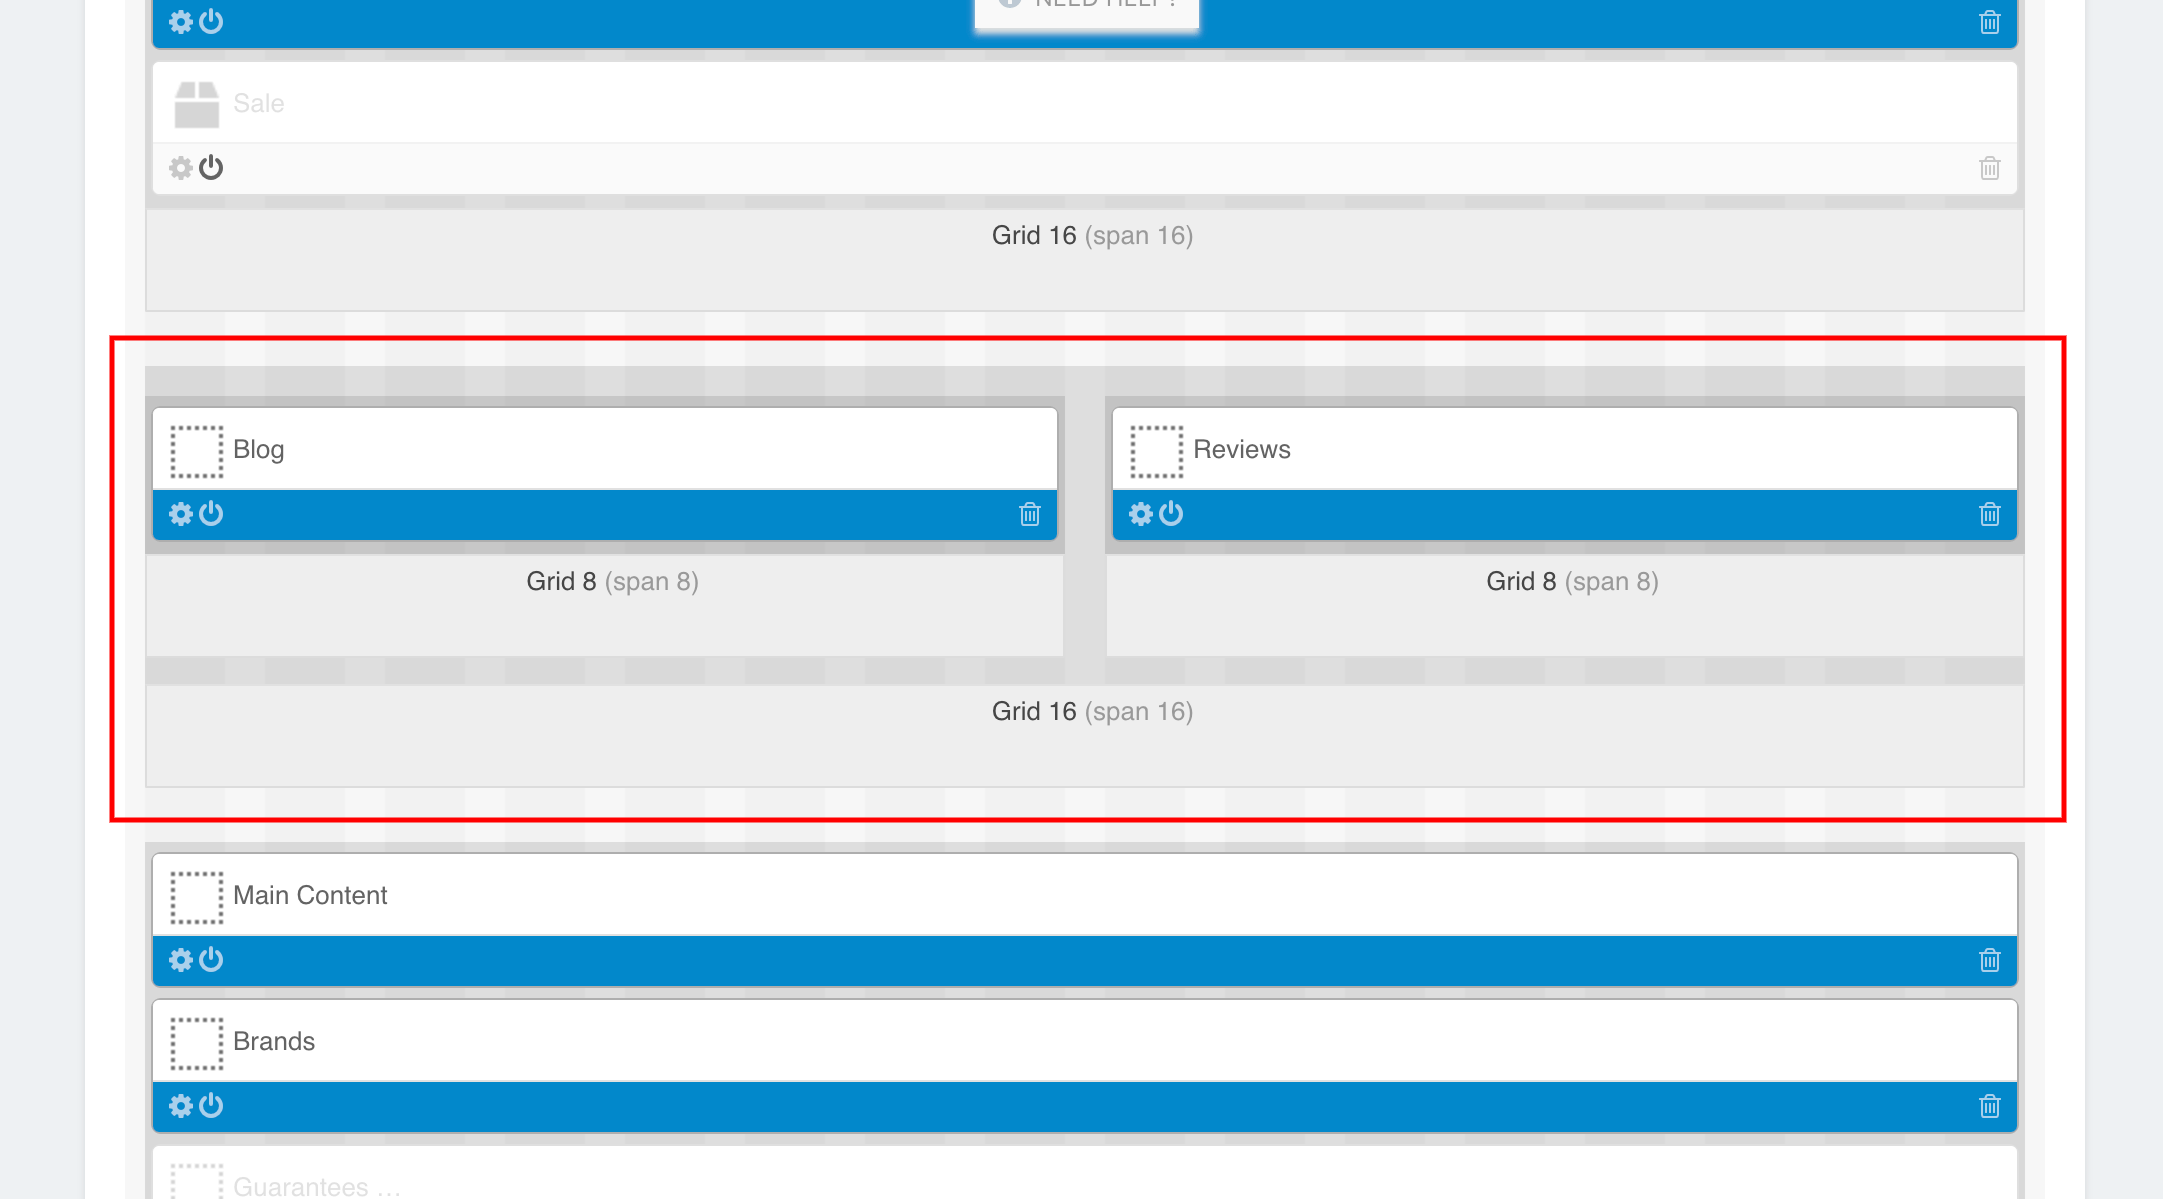
Background for a section with child sections (demo example: reviews block and blog)
- Create a section of maximum width, the default is 16
- After the section is created and the changes are saved, go to its settings (gear) and select the option Full width: Yes
- To make the background look better, add padding to the section. Turn on padding Top and Bottom
- In the setting Custom CSS class for the section add our own class, for example
fw_bg_2 - Next, add a background for this class via CSS
- How to add CSS to your store described here
An example of the styles used in the demo:
.fw_bg_2 {
background: #f7f7f7;
}
Next, add the child blocks to this section and add the blocks you need to them.
This is how it looks on the demo:
Parallax background
The logic is the same as in the examples above, but now we add a picture to the background and fix it using the CSS properties fixed 50%
Sample CSS code from demo:
.fw_bg_3 {
background: url('//demo.themehills.com/cscart/a_full_width_grid/images/companies/1/bg/austin-distel-wawEfYdpkag-unsplash_bg.jpg') no-repeat fixed 50%;
background-size: cover;
}
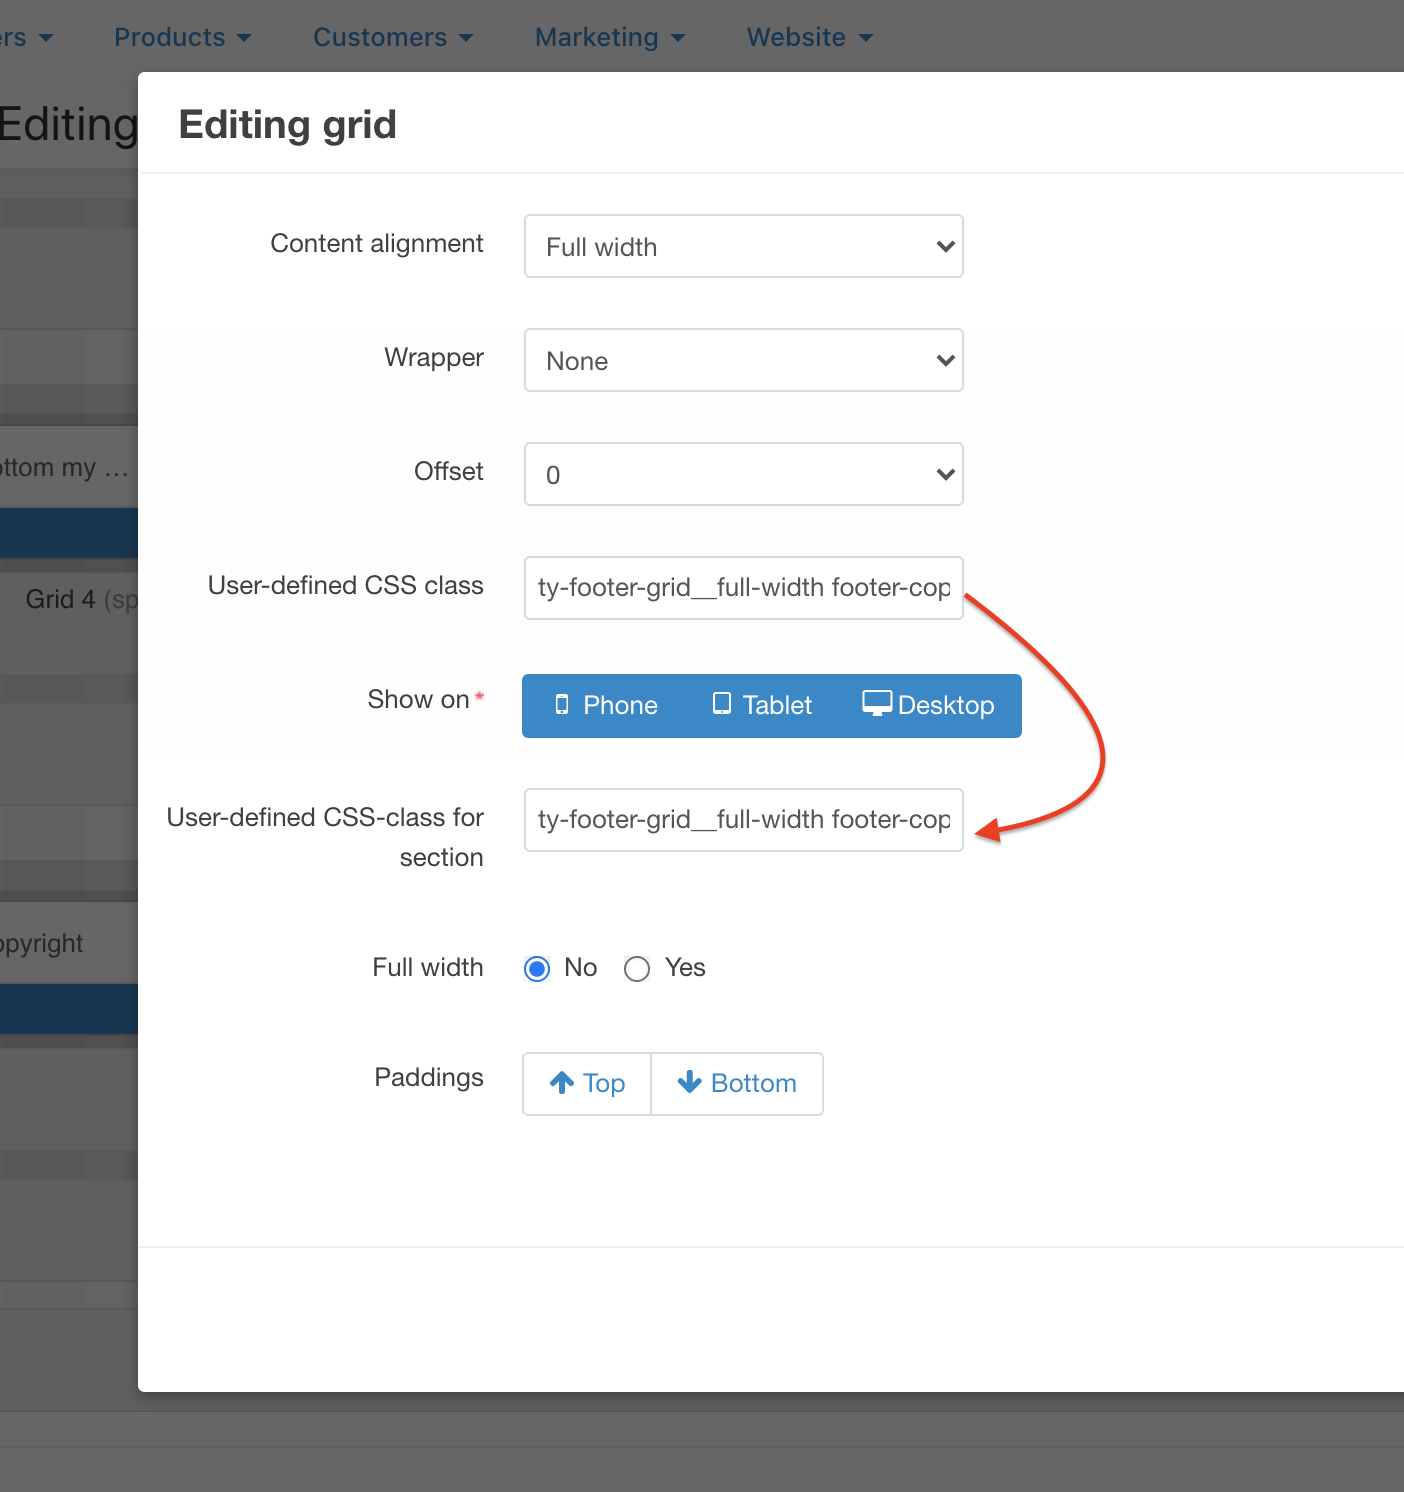
Errors in displaying the background in the footer
If you are using the standard Responsive or Bright theme, then the background in the footer may not be full width
To fix this, go to the problematic section and copy the classes from the field Custom CSS class
in the Custom CSS class for the section
This will solve the problem:
Restrictions on use – top
The add-on is not required when using the following themes:
- Thin, Emerald, Jelly Themes(ThemeHills)
- UniTheme2, Youpi Themes (AlexBranding)
They already contain similar functionality.
Change styles
Style files add-on should not be changed, this can lead to incorrect work of the add-on. If there was a need to redefine or add styles, please use Theme editor for this
- Go to Design > Themes
- Press Visual Editor in front of the currently active layout
- In the new tab, you will see your shop with Theme editor panel
- In CUSTOMIZE selector choose Custom CSS
- In textarea you can add your styles
- After editing save your changes by pressing Save and press [X] to close editor
Add-on Update – top
- make a full backup of the store
- close the store
- install the add-on over the old version without removing the previous one
- clear the cache
- if necessary, make changes that can be erased during the upgrade if you changed the add-on files directly
- check that everything is successfully updated
- open the store
To update language variables and add-on settings:
- Go to developer mode
- For this file local_conf.php add define(‘DEVELOPMENT’, true);
If you do not have a file, create one. - Clear the cache
- On the add-ons page in the drop-down list next to the add-on select “Update”
- Return to normal store mode
Changelog
1.04 (13 Dec 2023)
Updated the license system
Updates through the update center
Added the ability to enable/disable the add-on action for different areas of the layout

1.03 (21 Dec 2020)
Updated the add-on for compatibility with CS-Cart 4.12.1
You need to reinstall the add-on for CS-Cart Multivendor Ultimate

1.02 (26 Jul 2020)
Fixes in background styles

1.02 (26 Jul 2020)
Added paddings setting

1.00 (09 Jul 2020)
Release